Wednesday, December 29, 2010

InfoPath Form Error Messages "Updating content type failed" & "The following location is not accessible, because it is in a different site collection"

Deployment Steps we followed in Production Server

1. We took Backup of INFOPATH SITE using STSADM command
2. Downloaded template from Site Document Library (Reviews Document Library > Settings > Advanced Settings > Document Template > SITE Reviews/Forms/template.xsn).

3. While Publishing we promoted and de-promoted columns as per the as per column promotion requirement. But we got two error message when try to publishing the InfoPath Form template.

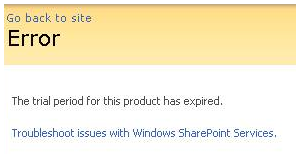
Error Message 1: "Updating content type failed"
Error Message 2: "The following location is not accessible, because it is in a different site collection: http://Servername/sites/SiteName/InfoPath_Library_Name/Forms/template.xsn"”.


Solution for the error message:

Need to Upgrade InfoPath Service Pack2 & Security Upgrade and information as below

1. Update for Microsoft Office InfoPath 2007 (KB976416)
URL: http://www.microsoft.com/downloads/en/details.aspx?FamilyID=79cc0c0f-6d2f-4a55-ad6f-7fd6bfa61896&displaylang=en

2. The 2007 Microsoft Office Suite Service Pack 2 (SP2)
URL: http://www.microsoft.com/downloads/en/details.aspx?FamilyId=B444BF18-79EA-46C6-8A81-9DB49B4AB6E5&displaylang=en

3. Security Update for Microsoft Office InfoPath 2007 (KB979441)
URL: http://www.microsoft.com/downloads/en/details.aspx?familyid=bfa8765a-7970-4feb-996c-7c27d71c97c6&displaylang=en

Wednesday, December 15, 2010

Could not load XSL file. The system cannot find the file specified. (Exception from HRESULT: 0×80070002) Content By Query Web Part or TableContentsWeb

We recieve this error while trying to edit ContentByQueryWebPart or TableContentsWeb.

The reason for this error is because the publishing features are not enabled for the site.
So we need to enable the publishing features.

For this first activate Office Sharepoint Server Publishing Infrastructure feature found at
Site Collection Administration – Site Collection Features.

Than enable Office Sharepoint Server Publishing feature at Site Administration- Site features

Tuesday, December 14, 2010

How do I Check in Multiple Documents With Sharepoint Designer?

Instructions

1. Start "SharePoint Designer" by clicking "Start" and highlighting "All programs" and then select "Microsoft Office" and click on "Microsoft Office SharePoint Designer."

2. When "SharePoint Designer" opens click on "File" and select "Open site." On the open site dialog box in the "Site name" box type the address there as if you were navigating to your SharePoint site in a browser and click on "Open."

3. This will open the site through "SharePoint Designer" in a tree view which is where all of the files, folders and sites are shown in the left-hand pane. Here you will see the "Document folders" as well, double-click on the folder that holds the documents and it will open the folder contents in the large center pane.

4. Drill down to the specific folder that holds the files you uploaded. Next to each folder you will see a "Green arrow" pointing down, and to the right it indicates the file is checked out. If you wish to check in multiple documents at once hold down the "CTRL" key and click on each file to highlight the files.

5. Right-click just "One" of the highlighted files and the sub-menu will pop up, select the option that says "Check in" and it will go through file by file and check them in. Once they have been checked in the "Green arrow" that was previously there will now be gone.

6. If you copy a whole folder to a "SharePoint site" you can go into "SharePoint Designer" and navigate through the sites and folders to the exact folder you copied just as you did before to check in multiple files, and this time right-click the "Folder" you copied and select "Check in." Just like the multiple files, it will process and check in each file. To verify this you will need to navigate into the folder to make sure that all of the "Green arrows" are gone.

Tuesday, December 7, 2010

Using SQL QUERY to Find Out Site Created & Last Access Date

SQL QUERY:

Use Content Database Name

GO

SELECT FullUrl AS 'Site URL', TimeCreated,
DATEADD(d,DayLastAccessed + 65536, CONVERT(datetime, '1/1/1899', 101))
AS lastAccessDate FROM Webs WHERE
(DayLastAccessed <> 0) AND (FullUrl LIKE N'sites/%') ORDER BY lastAccessDate

Monday, November 29, 2010

Creating & Adding an Event Handler

In this document, we will create an event handler that captures the events of the document library and add an entry in the cell of the document added. We can add an event handler using code or as a feature. In order to write an event handler, we will first create a sharepoint site and create a document library. We will, then, capture the events of the document library.


b1-1


1 Writing an Event Handler


We will start from the Visual Studio 2005 new project window. In the new project window, select C# Window application, then, class library as encircled in the figure below and name the project “DocLibEventHandler”.


2.jpg


1.1 Adding Reference


The first thing we will do in the class library is to add reference of the name space Microsoft.SharePoint. This is done by right clicking on the References link in the solution explorer and then clicking on “Add Reference…” as encircled in the following figure:


3.jpg


Clicking on add reference will generate a new pop up window Add Reference. We will select the Windows® SharePoint® Services namespace, as encircled in the figure below, and click on OK. It will add the Windows® SharePoint® Services namespace in our project.


4.jpg


We will add the names spaces, encircled red in the figure below, in our project so that we can directly use the classes in that namespace without specifying the complete path.


5.jpg


1.2 Changing Class Name


We will again go to the solution explorer and change the name our class from “Class1” to “DocLibEventHandlerClass”. This can be done by clicking on the class name in the solution explorer and right click on the class name. This will open a new window from which we will select Rename and change the class name from “Class1” to “DocLibEventHandlerClass”. As you change the name of the class, a prompt will appear, shown in the figure below, and ask would you like to rename all references to the code element “Class1”? Click on “Yes”


6.jpg


1.3 Inheriting Class


We will inherit our class from the class SPItemEventReceiver. The path to the class SPItemEventReceiver is Microsoft.SharePoint.SPItemeventReceiver. We have already added the namespace Microsoft.SharePoint, therefore, we just writet the name of the class SPItemEventReceiver for inheritance as shown in the figure below:


5.jpg


1.4 Capturing Events


MOSS provides two types of events namely, synchronous and asynchronous. The “…ing” event occurs before the action starts and the “…ed” occurs after the actions ends. “…ing” events occur synchronously while the “…ed” events occur asynchronously.


8.jpg


Synchronous events


  • Occur before the event.

  • Block the flow of code execution until your event handler completes.

  • Provide you with the ability to cancel the events resulting in no after event (“…ed”) being fired.


Asynchronous events:


  • Occur after the event.

  • Do not block the flow of code execution in SharePoint


To capture these events, class SPItemEventReceiver provides different methods, as shown in the right side of the above figure, which can be seen through Object Browser by pressing Alt+Ctrl+j to see the list of the methods by browsing through Microsoft.SharePoint to SPItemEventReceiver. We will create a simple program for demonstration purpose. The code will override methods ItemAdding, ItemAdded, ItemUpdated and ItemUpdating in the class SPItemEventReceiver.


1.5 The Code


The code will run when a new file is added in the document library and also when an existing document is updated. It will add an entry in the list “CEO Docs Access Log” describing the nature of the event and date on which event occurred. The code is as under:


namespace DocLibEventHandler


{


public class DocLibEventHandlerClass : SPItemEventReceiver


{


public override void ItemAdded(SPItemEventProperties properties)


{


SPListItem doc = properties.ListItem;


doc["Comments"] = “Document has been added”;


doc.Update();


}


//you can use following methods as well


public override void ItemAdding(SPItemEventProperties properties) { }


public override void ItemUpdated(SPItemEventProperties properties) { }


public override void ItemUpdating(SPItemEventProperties properties) { }


}


1.6 Signing the Assembly


The next step is of signing the assembly. To do this, you have to move to the properties window of the project. To do this, right click on the project name “DocLibEventHandler” in the solution explorer and click on the properties in the popup menu. This will open the properties window, select the Signing Pane of the properties window and check the “Sign the Assembly” option. Select <New…> from the “Choose a strong name key file:” and give the name that you desired. In our case, we named it “DocLibeventAssembly” as shown in the figure below:


9.jpg


1.6 Build Project


We will build by pressing F6 or clicking on Build in the tolls menu and then clicking on Build Solution. Build will generate the file “DocLibEventHandler.dll” in the debug directory.


1.7 Copying into GAC


The file DocLibeventHandler.dll can be found in the debug folder whose path is C:\…..\Visual Studio 2005\DocLibEventHandler\DocLibEventHandler\bin\Debug. Depending upon your installation, you can find the file in the debug folder. Copy the file “DocLibeventHandler.dll” from this folder and paste it in the GAC folder which is normally found at C:\WINDOWS\assembly. After copying the file in the GAC, copy the public token key as encircled in the figure below:


10.jpg


There are many other ways of adding assembly in GAC.


1.8 Registering the Event Handler


In order to register the event handler, add a new console project in the solution by right clicking on the solution “DocLibEventHandler” in the solution explorer as shown in the figure below:


11.jpg


Select a console project in the “Add New Project” window and name it “DocLibRegApp” as shown in the figure below:


2.jpg


Add the following code in the main method.


namespace DocLinRegApp{


class Program {


static void Main(string[] args) {


SPSite sp = new SPSite(“http://servername”);


SPWeb website = sp.OpenWeb();


SPList DocLib = website.Lists["DLOne"];


string assm = “DocLibEventHandler, Version=1.0.0.0, Culture=neutral, PublicKeyToken=1d6b41a3ed9a92cb”;


string class = “DocLibEventHandler.DocLibEventHandlerClass”;


DocLib.EventReceivers.Add(SPEventReceiverType.ItemAdded, assm, class);


DocLib.EventReceivers.Add(SPEventReceiverType.ItemAdding, assm, class);


DocLib.EventReceivers.Add(SPEventReceiverType.ItemUpdating, assm, class); DocLib.EventReceivers.Add(SPEventReceiverType.ItemUpdated, assm, class);


}


}


}


The string assm describes the assembly details that we have added in the GAC and class is the name of our class. Press F5 to run the project.


1.9 Changes in the Document Library


Open the site and add document in the document library. Comments column will have the value “Document has been added” as shown in the figure below:


13.jpg


SharePoint 2007 - Orphan Sites

I was working with alongside one of the guy's from Microsoft the other day and we were implementing the MS IT Site Delete Capture Utility available from Codeplex. Part of the testing required me to create/delete & restore sites. Briefly, the site delete capture utility intercepts both site/web delete requests and archives the site/web. Having deleted the site from within Site Settings of the site. I then attempted to restore the site using STSADM at which point I was presented with an message telling me that the site collection already existed and that I should use another name. Ive just deleted it so that cant be right, so i immediately navigate to Central Administration and surprisingly the offending site is still there. I then try to delete the site from within Central Administration page but again it would not delete. Finally, I try to delete the site with STSADM but I got this error with stsadm.exe -o deletesite: The system cannot find the path specified. (Exception from HRESULT: 0x80040E2F). Not sure at this point if this is as a result of implementing the site delete feature, I look at the Event logs, ULS and the log that is provided with the site delete feature. Nothing indicated that the site delete feature was at fault.

A quick search and I learn of a term called "Orphan Sites". As it happens, orphan sites are not that uncommon and Microsoft had previously worked on a fix. It seems however that in some cases this issue can still occur but what Microsoft have done is provide some pretty cool STSADM operators to help resolve it, if it does occur.

An Orphaned Site is where SharePoint only has partial information and not a complete set of data for a given site collection in your Windows SharePoint Services or SharePoint Portal Server content databases or configuration databases. The site may in fact still be viewable via the browser, but you may notice that many things are broken.

An orphaned site may manifest itself in one of the following:

  • STSADM -o restore fails to restore the site, even with the -overwrite option when you know the URL exists.
  • You may receive an error code 0x80040E2F. 0x80040E2F means “Violation of PRIMARY KEY constraint”, this equates to STSADM already finding previous rows in the database for the items it's trying to restore.

    NOTE: STSADM first looks at the Configration and Content Databases to ensure that the site does not already exist, if it does and you didn't use the -overwrite switch, it will fail. If STSADM does not find any information, it begins restoring which then results in the problem noted above.

  • STSADM -o deletesite fails to delete the site
  • You may receive and error which states "The site does not exist". Again, No site information in Configuration or Content database in their respective Sites tables. Thus the other remnants of the site cannot be cleaned up.

To resolve this issue you must carry our the following 2 actions:

STEP 1

  1. Open a command prompt and go to change directory to C:\Program Files\Common Files\Microsoft Shared\web server extensions\12\BIN and type the following:

    stsadm -o databaserepair -url http://Web/sites/Site -databasename <DatabaseName> (This will list all sites that are orphaned)

  2. Next, type the following:

    stsadm -o databaserepair -url http://Web/sites/Site -databasename <DatabaseName> -deletecorruption

  3. You will then be presented with a result in xml format with a deleted attribute that equals to YES

    <OrphanedObjects Count="22"><Orphan Type="SPSite" Id="{E732BEEC-F4BD-40D7-A51F-7B33BA7D5698}" Deleted="Yes" />

STEP 2
  1. Launch SharePoint Central Administration.
  2. Select Application Management and under SharePoint Web Application Management select Content Databases
  3. Select the Content Database where the offending site remains.
  4. Make a note of the following settings:

    • The name of the Content Database.
    • The number of sites before a warning is sent.
    • The maximum number of sites setting.
    • The Windows SharePoint Services Search Server.

  5. Click to select the Remove content database check box, and then click OK. When you are prompted to confirm that you want to remove the content database, click OK.
  6. Click OK.
  7. On the Manage Content Databases page click Add a content database.
  8. On the Add a Content Database page, specify the database server, the database name, and the database capacity settings. Then, click OK.
  9. Once you have dont that, select the Content Database you have just re-added and ensure you select the Windows SharePoint Services Search Server noted earlier.
Having done that you should now be able to restore/recreate a site with the old name.

For further reading try the following Sharepoint Orphans Explained

Friday, November 26, 2010

Server error: http://go.microsoft.com/fwlink?LinkID=96177

While trying to install WSS 3.0 SP1 (http://technet.microsoft.com/en-us/office/sharepointserver/bb735839.aspx) the installation get stuck at task 9 of 10 of SharePoint Products and Technology Configuration Wizard. When tried to access the server,
encountered the following error:

Server error: http://go.microsoft.com/fwlink?LinkID=96177

When look into the “Event Viewer”, found the following error description:

The schema version (3.0.149.0) of the database DATADATABASE_NAME on DATABA_SESERVER_NAME is not consistent with the expected database schema version (3.X.X.X) on DATABASE_NAME. Connections to this database from this server have been blocked to avoid data loss. Upgrade the web front end or the content database to ensure that these versions match.

Resolution:

The first thing we did was either remove content database from the web application which are having the error or Detach the database. This doesn’t seem to work. So we run the command

stsadm –o upgrade –inplace –url Central_Administration_URL –forceupgrade

and we were back in the business J.

Monday, November 22, 2010

An unexpected error has occurred. Web Parts Maintenance Page: If you have permission, you can use this page to temporarily close Web Parts or remove

"An unexpected error has occurred. Web Parts Maintenance Page: If you have permission, you can use this page to temporarily close Web Parts or remove personal settings. For more information, contact your site administrator. Troubleshoot issues with Windows SharePoint Services."

You may receive an error with a SharePoint page that has other web parts. The immediate fix is to delete the web part, but that's not a real workaround. Changing the trust level for the site worked for me.

This is the complete fix:
1. Open web.config file of current web application
2. Find the node that begins 3. Change the trust level from WSS_Minimal to WSS_Medium
4. Save the file
5. Drop to command prompt and execute : iisreset

Failed to instantiate file "TopAnswer.webpart" from module "WebPartPopulation": Source path "dwp\TopAnswer.webpart" not found.

Issue Details:

Failed to instantiate file "TopAnswer.webpart" from module "WebPartPopulation": Source path "dwp\TopAnswer.webpart" not found.
Troubleshoot issues with Windows SharePoint Services.

Solution Details:

1. Clear the SharePoint Fonfiguration Log Files

2. Upgrade MOSS SP2.

Monday, November 15, 2010

MOSS 2007, CSS, and you, the Non-Developer – the GlobalTitleArea


we started our little journey by changing the look and feel of the Quicklaunch menu and column by making changes in our copy of the CORE.CSS file.

We changed the background colors of the quicklaunch menu header and item cells, the colors of the default links and the borders of the quicklaunch menu. Today we are

going to focus on the area of the page that runs from the cell directly above the quicklaunch, actually part of the pagemargin, to the top of the global

bread crumb links at the very top of the page.


Before we get started I would like to stress the following:


  1. We are making the changes documented in this article in a COPY of the CORE.CSS file and then applying those changes through the administrative UI. You can rename the copy to most

    anything you want, I am using My_Core.css.


  2. I am working in a virtual environment in order to minimize any risk.


  3. Most administrators will not have access to the server. If that is your case contact

    your server administration team and request a copy of the CORE.CSS file and test any changes you make in a test environment prior to implementing them in any

    way, shape or form.


Once again we will focus on changing background and font colors. In addition to changing

the background colors by setting the background-color class to a color (#ffccff for example) we will look at how we can change the way some of those areas

appear by adding our own images.


  1. We’ll get started by changing the color of ms-titleareaframe, which will change

    the color of the cell that runs the width of the page directly above the quicklaunch menu and page body.


  1. In the next step we will add a background color to the cell between the globalnavigation tabs and the site actions menu. In order to this we’ll

    have to add a background-color declaration to the .ms-banner class and assign that declaration a color.


  1. After adding the background color to the ms-banner class above you will see small cells on the left hand side of the global navigation tabs and the right

    hand side of the site actions menu. In order to set a background color on those cells we will have to remove the image that Microsoft uses for the background

    and then change the property of the background-color declaration.


  1. Next we will set the background color of the cell that runs from the left of the site title over to the search scope box. We will do this by changing the

    property of the background-color declaration as shown in the following screenshot.


  1. Now if you look at the previous screenshot you’ll see that the ms-sitetitle class does not set the color of the entire row here. There will be a

    white background behind the sitetitle icon on the left hand side of the page header as well as a white background around the search scope drop down menu and

    search box on the right. We set the background color in both places by removing the default Microsoft image and then changing the background-color

    declaration in the ms-globaltitlearea class.


  1. At this point the last background area we have to change is the cell running the width of the page at the very top that contains the global breadcrumbs

    and the “Welcome User”, “My Site” and “My Links” links. This background is managed in the .ms-globalbreadcrumb class and

    can be changed by changing the background-color declaration.


  1. Now we’ll go back and change the font colors of the links in the header area of our page. It should be noted that in addition to changing the font

    colors here you can also change font-weight, font-family, font size etc… We’ll start with the global links which includes the breadcrumb links in the

    upper left of the page and the “My Site” link in the upper right. We’ll change those font colors in the .ms-globallinks class by changing

    the color declaration.


  1. As you can see above the font color of the “Welcome User” and “My Links” links did not change. For whatever reason SharePoint

    manages those font colors in the .ms-SPLink class and again by changing the color declaration.


  1. Next we’ll change the font color of the site title link. This color is managed in the .ms-sitetitle class and is changed by making a change to the

    color declaration.


  1. Our last font color change will be the color of the “Advanced Search” link. This is done in the .ms-sblink class and as with the other

    changes we have made done by changing the color declaration.


  1. As I mentioned in the opening we are also going to look at how we can change backgrounds using an image. For this I created a .jpg image in Photoshop

    that measures 200px wide and 40px high. I saved that image file in the /_layouts/images/ folder within the 12 hive. In order to display that image as a

    background all we need to do is either replace one of the images we removed in the steps above with the path to our new image or as I have done here add a

    background-image declaration to one of our classes and point that declaration to our new image as shown below.


I think that it’s important to note that it appears to me that the image will resize itself in most cases to fit the

height and width of the cell it is being added to. There may be cases where you will need to add a height or width declaration in order to accommodate the

image you are trying to add. Additionally if your image is much wider or higher than the cell you are inserting it into you can try adding an overflow

declaration and set the property to “hidden” in order for your image to fit properly. From what I have seen it’s more a trial and error

thing to figure out.


  1. The last step we are going to take in this article involves some behavior I find to be a bit strange and don’t entirely understand. I am still

    looking into it but here’s the fix I used for this specific issue. After I made the changes to the .ms-titleframearea we identified above I started

    seeing a large blue box on all my list pages. I found that the box is apparently another Microsoft image and I was able to get rid of it by removing the

    image in the .ms-pagetitleareaframe class as you will see in the following screenshot.


And now a couple of shots of your updated page to date:


Well, that’s all for this article. Next time we’ll look at changing the remainder of the pagemargin around the main page body as well as

changing the font colors of some of our default web parts. I hope you found this useful. If you have any questions or comments please don’t hesitate to

post them!


Until next time…


Sunday, November 14, 2010

WSS Web Services Web Reference

WSS Web ServicesWeb Reference
Administration Servicehttp:///_vti_adm/admin.asmx
Alerts Servicehttp:///_vti_bin/alerts.asmx
Document Workspace Servicehttp:///_vti_bin/dws.asmx
Forms Servicehttp:///_vti_bin/forms.asmx
Imaging Servicehttp:///_vti_bin/imaging.asmx
List Data Retrieval Servicehttp:///_vti_bin/dspsts.asmx
Lists Servicehttp:///_vti_bin/lists.asmx
Meetings Servicehttp:///_vti_bin/meetings.asmx
Permissions Servicehttp:///_vti_bin/permissions.asmx
Site Data Servicehttp:///_vti_bin/sitedata.asmx
Site Servicehttp:///_vti_bin/sites.asmx
Users and Groups Servicehttp:///_vti_bin/usergroup.asmx
Versions Servicehttp:///_vti_bin/versions.asmx
Views Servicehttp:///_vti_bin/views.asmx
Web Part Pages Servicehttp:///_vti_bin/webpartpages.asmx
Webs Servicehttp:///_vti_bin/webs.asmx

Monday, October 25, 2010

Change the port number for SharePoint Central Administration site

To change a port number that SharePoint Central Administration site is running on:
Open Command Prompt

1)
Go to BIN folder in SharePoint install directory (by default, it would be "C:\Program Files\Common Files\Microsoft Shared\web server extensions\12\BIN")

2)
To get the port number that Central Administration site is currently running on, type stsadm.exe -o getadminport

3)
To change a port number that SharePoint Central Administration site is using, typestsadm.exe -o setadminport -port

Thursday, October 21, 2010

Risk and Health Assessment Program for SharePoint Server (MOSSRAP) – Scoping Tool

Overview


The MOSSRAP Scoping Tool verifies connectivity requirements, permissions requirements, and other prerequisites for successful execution of the MOSSRAP toolset. This is done by remotely querying the servers in the SharePoint farm. This information is required before proceeding with the request process.

Description
The tool does NOT make any changes to the environment. It simply uses standard operations such as WMI queries, SQL queries, port queries and so on. It is completely read-only.The tool is serial in nature and only attempts to perform a single check against a single server at a time. This means there should be relatively minimal network or target system overhead while the tool is running. This also means it may take it several minutes to complete depending upon the size of the farm.


Who should run this tool?
The scoping tool must be run using an account that has:
Member of the local Administrators group on every SharePoint server in the farm
Member of the local Administrators group on every SQL server in the farm
Read permissions to every site in the farm (this can be granted via the web application policy in Central Administration)
Full permissions to the Central Administration site and the personalisation services for each Shared Services Provider (SSP) in the farm.
Member of the sysadmin role on every SQL instance used by the farm


What areas it report on?


The scoping tool runs through below areas to collect data and create report:
Port 135 (Netbios) Check to ensure port 135 is not blocked by a firewall.

Port 139 (Netbios) Check to ensure port 139 is not blocked by a firewall.


Port 445 (Microsoft-DS) Check to ensure port 445 is not blocked by a firewall.


Farm Topology The Farm Topology Check determines the topology and components within the SharePoint farm which will be used to run additional tests.


Farm Admin The Farm Admin Check verifies that the current logged on user has rights to access the farm which is required during your Risk Assessment from the tools machine


Metabase Access The Metabase check ensures that the IIS metabase can be queried remotely
Ping During the Risk Assessment network access to all machines is required. This check attempts to ping the remote machines via the NetBIOS name.


Remote Registry Access to the remote registry from the tools machine is required during your Risk Assessment. This check attempts to open the HKLM registry hive via the remote registry service.


Admin Shares Access to administrative shares is required during your Risk Assessment from the tools machine. This check attempts to enumerate through the administrative shares by querying the Win32_Shares WMI class.


Admin Access Access to the admin shares on the every server in the farm is required during your Risk Assessment.


Query Logman Logman.exe is used during the Risk Assessment to collect performance counters from the tools machine. This check ensures Logman.exe works against remote machines by running ‘logman.exe /query /s [machine]‘.


Log Parser 2.2 Logparser.exe is used during the Risk Assessment to collect and display information. This check verifies that LogParser 2.2 is installed on the local machine.


Windows Update Service Running This check verifies that the Windows Update service is running as required by the MBSA component during your Risk Assessment.


Latest Version of Windows Update Agent Installed The Automatic Updates service is used to ensure consistent application of Security and Critical Updates.


MBSA Installed Microsoft Baseline Security Assessment (MBSA) is used during the Risk Assessment to determine missing hotfixes. This check verifies that MBSA is installed on the local machine.


SysAdmin on Databases Checks to verify that the current user is a sysadmin on the content database instances. This is required in order to run the SQL BPA.


Server Service Running File and Print Services for Microsoft are required during your Risk Assessment for access to resources on the Servers and Nodes being checked. This check verifies that access to the Server Service is successful.


OS Language (Tools) Determines if the installed operating system Language is English on the computer running the tool. Currently, the tools machine must run an English language Windows Server operating system. Target systems may be non-English OS.


OS Locale (Tools) Determines if the installed operating system Locale is English (United States) on the computer running the tool. Currently, the tools machine must have Locale set as English (United States). Target systems may have non-English (United States) Locale.


Correct .NET Libraries Installed .NET Framework version 3.5 SP1 must be installed to ensure Tools are able to perform properly.


OS and SP Supportability Check Determines if the target operating system is supported or not. A RAP cannot be conducted against environments running unsupported products.
Separate Tools Computer Verifies that the tools computer is not a member of the farm being evaluated.
Loopback Check Security Feature Determines whether the loopback check security feature is enabled.


OS and SP RAP Supportability Check Determines if the target operating system and service pack have been tested for compatibility with the RAP. A RAP can be conducted against untested environments; however the RAP content is not validated or ensured to be functional. The delivery should proceed at the risk of the customer.


Got my test SharePoint 2010 environment checked, surprised with the result 3 failure and 4 warnings not bad lol.


Wednesday, October 20, 2010

Restoring Large STSADM backup file - operation failed error

When you are restoring large STSADM backup file, make sure that you have sufficient Log and Data disk space on SQL server. Presize SQL database to the size of STSADM backup and make sure that your LOG drive has as least four (4) time the size of STSADM backup size or your backup will fail with "operation failed" error.

Why do you so much disk space on SQL server? During STSADM restore, wedecompreses all files all files stored in STSADM dat file, so you LOG file will grow at leaset 3-5 times the size of STSADM backup file.

Why I can't open SharePoint site as a folder on the server?

Issue:

Administrator can't open open SharePoint site as a folder on the server?
For example \\sharepoint-web-app-name\sitename

Error: No network provided accepted the given path.

Solution: Enable Web Client Service

STSADM Export vs. Limited Harddrive Space

I came across a situation at work where I had to run the stsadm -o export command to backup my development SharePoint sites. My restore options were limited because I was only allowed to access Central Administration on my development SharePoint server, but NOT on the Production servers. I was also unable to remote to the Production SharePoint server, nor did I have the ability to schedule a Content Deployment job from Central Admin.

My task was to backup all my sites on my development server and then restore them into production. Because of my limitations to the production environment, this is what i had decided to do:
1. Remote to my development servers and run stsadm -o export to backup my sites.2. Using SharePoint Designer, restore my backup files to production.
If this wasn’t complicated enough (time consuming, rather), I was running out of space on my development server. Running stsadm -o export produces temporary files that will eventually become your .CMP backup files. However, since my sites were large and had many versions of documents, the limited space was prohibiting me from finishing my backups. I had no choice but to kill the backup job until I found a solution, which i did.
This will only work if you have more than one partition on your SharePoint server, and luckily for me, I did.
My C drive only had 3.19gig of available space, but I had a D drive with 39gig of available space.
The STSADM Export command stores temporary files into your TEMP (or TMP) directory as defined in your Environment Variables. You can find our where these temp directories are by right clicking on “My Computer” and selecting “Properties”, then choose the “Advanced” tab. Finally, click the “Environment Variables” button at the bottom of the dialog box.
In the top window (User variables for username), you will see the “TEMP” and “TMP” variables. The default value for these are “%USERPROFILE%Local Settings\Temp”.
I created a new “TEMP” directory on my D drive (since it had a lot of extra space) and modified both my “TEMP” and “TMP” user variables to point to this new location. After logging off and back on again, i was able to rerun the stsadm -o export command to backup my entire site and all subsites without running into problems of not having enough space.
I hope this helps.
(PS. I am not responsible for your actions to my posts. These steps worked for me in my own testing environment.)

Tuesday, October 5, 2010

SharePoint V3: Error: Failed to activate feature 'PublishingPrerequisites'

Description:Receiving error when attempting to activate the Office SharePoint Server Publishing Infrastructure, site collection feature:Error: Failed to activate feature 'PublishingPrerequisites'


Solution:- Run IISReset on the front end web serversStart > Run > CMD > iisreset /noforce- Activate the featureSite Actions > Site Settings > Site Collection Features > Office SharePoint Server Publishing Infrastructure > Activate

Thursday, September 23, 2010

List of SharePoint functions available

List of functions available

All of the functions available are listed below. I have only tested a sample of these in a MOSS 2007 list, but in theory most/all should work!


Thursday, August 5, 2010

How To: Reduce SharePoint database log file size?

Sometimes, your SharePoint server space may be very low. This is because, the SharePoint server database log will be increased slowly day by day.
For example, you may have 30 or 40 GB free space in C drive, when you installed SQL Server in your database server. After 1 or 2 months, your database server C drive may be very low. So that you will get "Low disk space" error. This is beacuse, the log file size will be high.
So, here I am going to explain, how to reduce the size of the Database log file size to 1MB.

1. First open your SQL Server management studio 2005.
2. Click "New Query"
3. Type the below Command. Here, "WSS_Content_10002" is my database name. replace this text with your database name.
BACKUP LOG [WSS_Content_10002] WITH TRUNCATE_ONLY
USE [WSS_Content_10002]
GO
DBCC SHRINKFILE ('WSS_Content_10002_log' , 1)
GO

Finished. Now, you can see that the free space in C Drive will be increased.

Wednesday, August 4, 2010

Error: The application is unable to accept further updates because the last attempt to persist the state failed. See the event log for more details

Error:
The application is unable to accept further updates because the last attempt to persist the state failed. See the event log for more details

Solution:
Sometimes you will get this error, when you configure the search in sharepoint server. Do the below steps, one by one.

1. Go to central admin
2. Go to Operations Tab.
3. Click on "Services on Server" link and Stop the "Office Sharepoint Server Search"
4. Again, start the "Office Sharepoint Server Search".
5. Go to SSP & Search Settings.
6. Here you have to configure again the search settings.
7. Then, It will take few minutes to complete teh operation. (based on the Timer execution).

Thats it...

Friday, June 18, 2010

Troubleshooting SharePoint Diagnostics Logging

Production Server were creating blank log files, 0KB in size without any errors or apparent issue.


I started with some basics:

1) Is there adequate disk space on the server(s)?
2) Is the “Windows SharePoint Timer Service” running?

I then restarted the timer service to ensure that the credentials were still valid. But that didn’t help.

Next, I wanted to validate what my logging levels were set to, so I ran the following STSADM command:

stsadm -o listlogginglevels

This revealed that everything was set to “None” from the original defaults.

I next ran the following command to reset values to defaults:


Finally I ran the stsadm -o setlogginglevel -default command then issue resolved.


Thursday, June 3, 2010

The trial period for this product has expired

Error Image:


Solution 1:

Change your app pool account from “Network Service” to Domain account.

Solution 2:

Upgrade Latest SP2 to Moss Server.
URL: http://blogs.msdn.com/b/sharepoint/archive/2009/06/25/service-pack-2-update.aspx

Solution 3:

1. Open the associated web.config
2. Make any change and undo it
3. Save the web.config

Thursday, May 27, 2010

Copy Images or Files from One Site to Another

//Get the context of the Image site
SPSite DestSite = new SPSite("Site URL");
//Access the folder under Images
SPFileCollection DestImages = DestSite.RootWeb.Folders["Images"].Files;
// Get the current site context
SPSite SourceSite = SPContext.Current.Site;
// Access the Provisioned site Webparts folder under _catalogs
SPFileCollection SourceImages = SourceSite.RootWeb.Folders["Images"].Files;
foreach (SPFile DestImage in DestImages)
{
// Load the properties of the existing file
byte[] binaryData = DestImage.OpenBinary();
// Copy the file
SPFile copiedFile = SourceImages.Add(DestImage.Name, binaryData, true);
copiedFile.Update();
}

Friday, May 21, 2010

SharePoint Search Result Open on Browser

Solution:

Add Following Javascript File to OSSSearchResults.aspx result page.

Javascript Code:

function getURLParam(strParamName)
{
var strReturn = "";
var strHref = window.location.href;

if ( strHref.indexOf("?") > -1 )
{
var strQueryString = strHref.substr(strHref.indexOf("?")).toLowerCase();
var aQueryString = strQueryString.split("&");
for ( var iParam = 0; iParam <>
{
if (aQueryString[iParam].indexOf(strParamName.toLowerCase() + "=") > -1 )
{

var aParam = aQueryString[iParam].split("=");
strReturn = aParam[1];
break;
}
}
}
return unescape(strReturn);
}

Wednesday, May 19, 2010

SharePoint Immediate Alerts Not Working

There are various issues with the sharepoint alerts.

Problem 1: Not a single site sends the alerts.Problem
2: A specific site fails to send the alertsProblem
3: A specific user fails to receive the alertsProblem

Problem 1: Not a single site sends the alerts.

After registering for alerts on a SharePoint list/document library, you get the welcome email "You have successfully created an alert for 'doc lib' ". But you will never get the actual alert mail for the changes on the document/item you marked for an alert.

Reason:
There is a config/environement change that was not reflected into the config database or config cache.

Fix:

1. Stop the WSS Sharepoint timer servicestart -> admin tools -> services -> Windows Sharepoint Services timer -> stop.

2. Delete the UN used Alternate Access Mappings (CA-> Operations -> Alternate Access mappings); UN used IP configurations, orphans in the DB.

3. Clear the config cache.- Go to the local sharepoint config files folder:C:\Documents and Settings\All Users\Application Data\Microsoft\SharePoint\Config\ConfigDB ID- Delete all the XML files and do not delete the "cache.ini" file.- Delete all the numbers in the "cache.ini”, type 1 and save it.

4. Start the WSS Sharepoint timer servicestart -> admin tools -> services -> Windows Sharepoint Services timer -> Start.

5. Check whether the timer job is successful or not. Also see the immediate alerts status.CA -> Operations -> Timer Job Status

6. Check whether the 'alerts' is configured in Minutes: A -> Operations -> Timer Job definitions.

7. Sometimes there will be a problem with the mail provider settings. Check the SMTP Relay settings to see the IP Address configured properly.


Problem 2: A specific site fails to send the alertsReason:

There is a config/environment change in a specific site. In other scenarios, if a site is migrated from different environment or another version. So, you do not get alerts on that specific site.

Fix:

1. (Do this step if your environement is flexible)Create a new web application/new content database and test for the alerts. On success, move this perticular problematic site to the new web application/content database.

2. Force the "alerts enabled" command on the perticular site.C:\Program Files\Common Files\Microsoft Shared\web server extensions\12\BIN> stsadm.exe -o setproperty -pn alerts-enabled -pv "true" -url http://sitename/.You will be fine.

Other commands:

1. Though you can do all these below commands through CA UI, STSADM is preferred.
To verify whether a site has the alerts enabled:Stsadm.exe-o getproperty -url http://sitename/ -pn alerts-enabledThis will return Yes or No.

2. To disable alerts on a site:stsadm.exe -o setproperty -pn alerts-enabled -pv "false" -url http://sitename/

3. Verify the job-immediate-alerts. Should be every 5 minutes.stsadm.exe -o getproperty -url http://sitename/ -pn job-immediate-alerts

4. If the above command returns anything other than "Every 5 minutes between 0 and 59", set the timestsadm.exe -o setproperty -pn job-immediate-alerts -pv "every 5 minutes between 0 and 59" -url http://sitename/


Problem 3: A specific user fails to receive the alertsReason:

There must a problem with the registered email id. Or user might not have at least "read" access on the document library.

Fix:

1.Check for the user access on the doc library. If not, add the user with at least "read" access.It may happen that the user gets the initial mail. Coz, initial mail doesnt look for the permissions before sending the mail.

2. While configuring, use the "email id" instead of the usual "Domain\Name". If succeeded, then there must be a problem with the email id registered.

3. To confirm the email not in sync,SQL -> Associated Content Database -> Tables -> ImmedSubscriptions -> email field

Tuesday, May 11, 2010

Evaluation Version Expired but not really

A friend was building a server and ran into an issue where he was installing a fresh server, put in his trial key and assumed he did everything right, but was getting an error message: "The evaluation version of Microsoft Office SharePoint Server 2007 for this server has expired."

ACTION:
Current user updated MOSS2007 and registered his Volume License Key to the MOSS2007 Installation. Current user tries to Access his "My Site" RESULT: Current user receives following error: "The evaluation version of Microsoft Office SharePoint Server 2007 for this server has expired."

CAUSE:
Insufficient permissions for the groups WSS_WPG, WSS_ADMIN_WPG to the Registry The application pool identity for your WSS/MOSS sites *MUST* be in the "Distributed COM Users" group in order to successfully activate.

RESOLUTION:
We gave group WSS_WPG Read permissions to following registry key HKEY_LOCAL_MACHINE\SOFTWARE\MICROSOFT\Office Server\12.0 We gave group WSS_ADMIN_WPG Full permissions to the same registry key HKEY_LOCAL_MACHINE\SOFTWARE\MICROSOFT\Office Server\12.0 We added application pool Account ("dcomcnfg.exe") to the Distributed users We rebooted the server

By the way, these are the kind of blog posts that I like to run into when searching for answers on the Internet. They kind of feel like a KB article. Let's say you're an IT guy, but don't know what to blog about. You run into an issue, you solve it. Ideal and perfect for a post. Short and sweet. Great reference for you and the rest of the world. If they don't need the info, the don't need to read it.

The evaluation version of Microsoft Office SharePoint Server 2007 for this server has expired

Definitely not the message you want to see after paying a whole lot of bucks. This happened to a colleague of mine when he tried to setup "My Sites". In fact, same error message was thrown whenever he tried to use any feature of "MOSS Enterprise".

Here is the solution:

1. Open the associated web.config
2. Make any change and undo it
3. Save the web.config

Believe it or not that is your solution. Hope this helps to somebody

Tuesday, May 4, 2010

How to create MySite Programmatically

SharePoint provides APIs to create MySite programmtically. UserProfile object provides a method to create personal site. Following console application creates MySite for a given account:

using Microsoft.Office.Server;
using Microsoft.Office.Server.Administration;
using Microsoft.Office.Server.UserProfiles;
using Microsoft.SharePoint;
using System.Web;


namespace UserProfileCreate
{
class Program
{
static void Main(string[] args)
{

using (SPSite site = new SPSite("http://servername"))
{
ServerContext context = ServerContext.GetContext(site);
UserProfileManager profileManager = new UserProfileManager(context);

string accountName = "domainname\\username";
UserProfile userProfile;
if (profileManager.UserExists(accountName))
{
userProfile = profileManager.GetUserProfile(accountName);

userProfile.CreatePersonalSite();

}
}
}
}
}

Wednesday, April 21, 2010

EyeView of Sharepoint 2007 Architecture

After having installed SharePoint 2007, at the face of it, the localhost URL or http://<> now shows a SharePoint portal website – but there's a way lot more that just happened behind the scenes.

The following steps happened between that double click on the SharePoint 2007 installation, the configuration wizard with 10 steps, and your going to http://<>.

1. A new instance of SQL Express was created on your machine. This is by default identified by <>/OFFICESERVERS.

2. In this new instance, various databases were created. Many of them have a curiously same structure, as they are all the "backends" for various Sharepoint WebApplications.

3. Various Websites were setup in your IIS. All of these, are running on the Sharepoint engine. All of these are running on ASP.NET 2.0. But one of these, is the Sharepoint Central Administration Website. So, a SharePoint WebSite manages other Sharepoint Websites!! This kind of segregation makes production push and deployment of newer sites a lot easier.

4. The Sharepoint Central Administration Website (SCAW). It's got 3 major areas - Home/Operations/Application Management. Home - is a SharePoint page, where you can view/administer various tasks, topology, or add any other WebParts you wish. This is based on the "Blank" template, which presents you with a great whitespace to throw WebParts in. These Administration widgets - are nothing but WebParts themselves!!

SharePoint now has a check-in/check-out mechanism for all front end changes, including a workflow, defined in WWF (Windows Workflow Foundation). Which means, you can plug in your own, or a third party workflow. This behavior is overridable and customizable.

Under Operations – you can do operations that are more "global" in nature. Like managing your web farm, various jobs, backups, database admin etc. This is typically what the Infrastructure/IT guys will mostly use.

Finally under Application Management is where things get fun. Especially fun if you have an environment where you manage multiple websites. Why? Because the organization of various websites within SharePoint, is frankly outstanding.

You have at the top level Web Applications. So you go ahead and create a Web Application (there are a couple created for you out of the box). You have various customizations you can specify in the WebApplication - for instance, what application pool must be used, where should the database live, and a whole lot of other stuff at the same level.

Then under each WebApplication you have "Sites Collections". These Site Collections are - what are individually created for each .. say for instance, department within your organization. You have a fantastic degree of customizability within each one of these. Many templates come out of the box, you could write your own, but in addition you can specify a number of things such as quotas, administrators, security settings, and "self maintainance" information etc.

Tuesday, March 23, 2010

Steps to Clear SharePoint Configuration Cache

1. On all Servers in the farm, stop the Windows SharePoint Services Timer service (OWSTIMER.EXE). To do this go to the Services Console, right click on Windows SharePoint Services Timer service and click stop.

2. After this go the SharePoint Server running Indexing Server and navigate to “System Drive\Documents and Settings\All Users\Application Data\Microsoft\SharePoint\Config\GUID” in case of Windows Server 2003 or “System Drive\ProgramData\Microsoft\SharePoint\Config\GUID” in Windows Sever 2008.

3. In the folder there is single “cache.ini” & rest all are XML files. Delete all the XML files except for the “Cache.ini file”, make sure you do not delete the “cache.ini”. This is very important, do not even delete the whole GUID folder too, this is also very important. I repeat do not delete the GUID folder or the cache.ini file!

4. Now open the “cache.ini” file and note down the number. Clear the number and type in 1.

5. Click save and close the “Cache.ini” file.

6. Now start the Windows SharePoint Services Timer Service on the Indexing Server from the services console.

7. Now, you will see all XML files being generated again.
Open the Cache.ini and you will see same the number, as you noted down before.

8. Now repeat steps 2-8 on all queries servers followed by application/web servers.

Thursday, March 18, 2010

Custom code to get the list of site collection administrators for all the site collections in SharePoint server farm

Alright we have changed our idea of giving "Administrator" level access to all the site collections to the outsourced team. Instead we decided to deliver them an Excel document with the URL and site collection administrators for each site collection. In fact, all the outsourced team members have access to their own team site. So we are going to upload this Excel document to their team site.As usual, I wrote C# console application to achieve this.Note:1. This code assumes that you have all the site collections created under "sites/"2. This is a console application so you have to use it the way you use stsadm command.3. This code will output a text file with comma separated values when you run it as follows,SCAdmin.exe -url http://sharepoint.domain.com > SCAdmins.txt4. Finally you can import SCAdmin.txt file to an Excel document with ","(comma) selected as separator for creating a new column.5. SCAdmin.txt file should look like this,http://sharepoint.domain.com/sites/SC1, domain\spadmin;http://sharepoint.domain.com/sites/SC1, domain\spadmin; domain\user2; domain\user3http://sharepoint.domain.com/sites/SC1, domain\user4; domain\user5;http://sharepoint.domain.com/sites/SC1, domain\spadmin; domain\user6http://sharepoint.domain.com/sites/SC1, domain\user7;..........................................................6. When you import SCAdmin.txt to an Excel document by selecting "," (comma) as the separator, it will place URL in first column and site collection administrators in second column.Disclaimer: Please test this code in test environment before you use it. I will not be responsible the outcome of this code.Here is the code,using System;using System.Collections;using System.Collections.Generic;using System.Text;using Microsoft.SharePoint;using Microsoft.SharePoint.Administration;using Microsoft.SharePoint.StsAdmin;namespace SCAdmins{ class SCAdminsClass { static void Main(string[] args) { SCAdminsClass sc = new SCAdminsClass(); sc.getSiteCollectionAdministrators(args); } private void getSiteCollectionAdministrators(string[] args) { try { string mode = ""; string virtualserver = ""; // get command line arguments if ((args.Length == 0) (args.Length == 1 && (args[0] == "-?" args[0] == "-help"))) { displayOutput("", mode); displayOutput("SCAdmin.exe -url VirtualServerURL [-quiet]", mode); displayOutput("", mode); displayOutput(" -url VirtualServerURL: Full URL of virtual server starting with http://", mode); return; } // loop through command line arguments for (int i = 0; i < args.Length; i++) { if (args[i] == "-url") { virtualserver = args[i + 1]; i++; // make sure url parameter starts with http: if (!virtualserver.StartsWith("http:")) { throw new ArgumentOutOfRangeException("url parameter should start with http://"); } } else if (args[i] == "-quiet") { mode = "quiet"; continue; } else { displayOutput(String.Format("Unrecognized switch {0}", args[i]), mode); return; } } // connect to web application on virtualserver SPWebApplication webApp = SPWebApplication.Lookup(new Uri(virtualserver)); // create site collections object for web application SPSiteCollection siteCollections = webApp.Sites; string SCUrl = ""; int SCCount = 0; SPSite site = null; SPWeb web = null; string admins = ""; // loop through site collections foreach (SPSite siteCollection in siteCollections) { site = new SPSite(siteCollection.Url); web = site.OpenWeb(); SCUrl = siteCollection.Url; if (SCUrl.Contains("sites")) { SCCount++; SPUserCollection users = web.Users; foreach (SPUser user in users) { if (user.IsSiteAdmin) { admins = admins+user.LoginName+"; "; } } Console.WriteLine(SCUrl + ", " + admins); } admins = ""; } //Console.WriteLine("Total Site Collection: " + SCCount); } catch (Exception e) { Console.WriteLine(e.Message); } } private void displayOutput(string text, string mode) { if (mode != "quiet") { Console.WriteLine(text); } } }}

Site Storage WebPart

For SharePoint site Administrators it could be important to view the storage of a SiteCollection (and subsites). However, SharePoint sites are often hosted by a external hosting and administrators have no access to the Central Administration. I wrote the following WebPart which summarizes the storage of a SiteCollection and the SubSites of this SiteCollection. Since there's no property for getting the Site Size I make recursively use of the Folder Size of a SPWeb.


public class SiteUsageWebPart : System.Web.UI.WebControls.WebParts.WebPart{ public SiteUsageWebPart() {
}
private SPSite siteCollection; private SPWeb site; private SPWebCollection sites;
protected override void CreateChildControls() { siteCollection = SPContext.Current.Site; site = SPContext.Current.Web; sites = siteCollection.RootWeb.Webs; }
private long GetWebSize(SPWeb web) { long total = 0;
foreach (SPFolder folder in web.Folders) { total += GetFolderSize(folder); }
foreach (SPWeb subweb in web.Webs) { total += GetWebSize(subweb); subweb.Dispose(); }
return total; }
private long GetFolderSize(SPFolder folder) { long folderSize = 0;
foreach (SPFile file in folder.Files) { folderSize += file.Length; }
foreach (SPFolder subfolder in folder.SubFolders) { folderSize += GetFolderSize(subfolder); }
return folderSize; }
private double ConvertBytesToMegabytes(long bytes) { return (bytes / 1024f) / 1024f; }
protected override void Render(HtmlTextWriter writer) { writer.WriteLine(""); // Size of the Rootweb writer.WriteLine(""); writer.Write(""); writer.Write(""); writer.WriteLine(""); writer.WriteLine("");
foreach (SPWeb subSite in sites) { writer.WriteLine(""); writer.Write(""); writer.Write(""); writer.WriteLine(""); writer.WriteLine(""); //SPListCollection lists = subSite.Lists;
//foreach (SPList list in lists) //{ // writer.Write(SPEncode.HtmlEncode(list.Title) // e.g. you can also summarize list sizes //} } // Total Size of SiteCollection writer.WriteLine(""); writer.WriteLine(""); writer.Write(""); writer.Write(""); writer.WriteLine(""); writer.WriteLine("");
writer.WriteLine("
" + SPEncode.HtmlEncode(siteCollection.RootWeb.Title) + " (RootWeb)" + siteCollection.RootWeb.Url + "" + SPEncode.HtmlEncode(ConvertBytesToMegabytes(GetWebSize(siteCollection.RootWeb)).ToString("0.00")) + " MB
" + SPEncode.HtmlEncode(subSite.Title) + "" + subSite.Url + "" + SPEncode.HtmlEncode(ConvertBytesToMegabytes(GetWebSize(subSite)).ToString("0.00")) + " MB
---------------
Total size of sitecollection " + siteCollection.Url + "" + SPEncode.HtmlEncode(ConvertBytesToMegabytes(siteCollection.Usage.Storage).ToString("0.00")) + " MB
"); }}

Friday, March 12, 2010

‘Access Denied’ when activating the ‘Server Publishing Infrastructure’

I recently had to activate the publishing infrastucture on a WSS v3 Teamsite. This had always worked before, but now I was getting ‘Access Denied’ when activating the ‘Server Publishing Infrastructure’.

This was due to my change in devlopment procedure. I always used to create development farms using Administrator for everything, but scince I found problems with feature activation I am developing using the Microsoft Guidelines for MOSS accounts. This means the AppPool account has limited permissions.

To solve the ‘Access Denied’ problem you need to elevate the permissions of the AppPool of the web application on which you are trying to activate the Publishing Infrastructure feature.

One way to achieve this is to temporarily change the AppPool of the web application…

1. Open IIS Admin.
2. Location the Web Site for your WSS web application.
3. Goto to the properties and select the ‘Home Directory’ tab.
4. Change the AppPool to be the same as Central Administration.
5. IISRESET
6. Activate the Publishing Infrastructure feature on your site.
7. Change to AppPool back to the original.
8. IISRESET.

This should allow you to enable the feature and use the publishing features within MOSS.

Wednesday, March 10, 2010

Unable to modify navigation - Add heading/link

Issue Description:
When I Try to modify Navigation in a site and add a heading, this is not working. When pushing OK, there is nor error messages appearing, but the heading is not showing up.

Solution Description:

Use Following Command to Fix the issue:

use Content Database Name

INSERT INTO [NavNodes] ([SiteId] ,[WebId] ,[Eid] ,[EidParent] ,[NumChildren] ,[RankChild] ,[ElementType] ,[Url] ,[DocId] ,[Name] ,[DateLastModified] ,[NodeMetainfo] , [NonNavPage] ,[NavSequence] ,[ChildOfSequence])

SELECT DISTINCT SiteId, WebId ,1002 ,0 ,0 ,1 ,1 ,'' ,NULL ,'SharePoint Top Navbar' ,getdate() ,NULL ,0 ,1 ,0
FROM NavNodes
WHERE WebId NOT IN (
SELECT WebId
FROM NavNodes
WHERE Eid = 1002)